

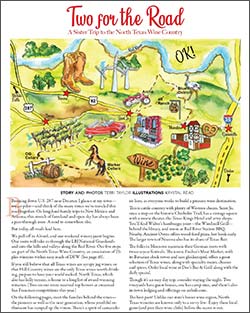

By Sherri Brooks Vinton
These two different non-tomato salsas are versatile— each can utilize a variety of ingredients so you can take advantage of what’s coming off your local fields.
Stone Fruit Salsa Ingredients:
1½ cups apple cider vinegar
3 cups water
2 tablespoons salt
1 cup dark brown sugar, lightly packed
4 pounds firm plums, apricots or peaches, pitted and cut into ¼” dice (peel peaches)
1 pound red bell pepper, finely diced
1 pound red onion, finely diced
1 habanero chile, finely minced
2 cloves garlic, minced
1 cup cilantro, finely chopped
Cucurbit Salsa Ingredients:
2 cups white distilled vinegar
3 cups water
1 cup white sugar
2 tablespoons kosher salt
1 teaspoon black pepper
1 tablespoon ground cumin
4 pounds zucchini, summer squash or cucumbers cut into 1/4” dice
1 pound white or yellow onions, finely diced
1 pound poblano chiles, roasted, skins, ribs and seeds removed, and finely diced
1-2 jalapeño chiles, ribs and seeds removed, finely diced
2 cloves garlic, minced
1 cup cilantro, finely chopped
Make the salsa:
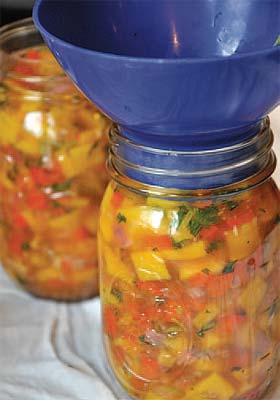
Combine all ingredients, except cilantro, in a large heavy-bottomed pot and slowly bring to a boil. Reduce heat, simmer for 5-10 minutes, until produce is soft, and onions are translucent. Add cilantro and simmer for an additional minute.
Cool and refrigerate for up to three weeks or can, using the Boiling Water Method (see below). Makes about 6 pints.
The Boiling Water Method
The Boiling Water Method is the grandmamma of preserving methods. You can use it to put up all kinds of delicious things— jams, jellies, chutneys, tomatoes and salsas and more. It’s truly easy to accomplish and not nearly as dangerous as many fear. Just follow your recipe—skimping on the vinegar or changing up ingredients might throw off the all important acid balance which keeps the food safe on the shelf—and you’re good.
Equipment:
- Canner or stockpot, with lid
- Canning rack, cake cooling rack or enough canning jar rings for a layer in bottom of pot
- Three piece canning jars, such as Ball jars
- Small, heatproof bowl
- Canning tongs
- Bubble tool, chopstick or plastic knife
- Canning funnel (optional)
- Lid lifter (optional)
Process:
Wash all equipment and jars in hot, soapy water. Arrange equipment and jar rings on clean tea towel, preferably next to stovetop. Place lids in heatproof bowl, white side down and cover with boiling water to soften gaskets. Place canning rack in canner and fill with jars. Fill canner to tops of jars with cold water and bring to a boil. Turn off heat.
Using canning tongs, remove required number of jars from canner, pouring water back into canner and setting jars on towel-covered surface. Ladle hot recipe into cup or pint sized jars, leaving ½-inch headspace (distance between top of recipe and top of jar, varies with each recipe). Run bubble tool down along inside of jar to release trapped air.
With a piece of dampened paper towel, wipe rims clean. Pick up lids, with lid lifter if using, and center on jars. Screw bands on just finger tip tight.
Use tongs to return jars to canner and cover. Return canner to boil and process salsa for 15 minutes (timing may vary for other recipes).
Turn off heat, remove canner lid and rest for 5 minutes. Using tongs, lift jars straight out of canner to a towel covered surface and set aside for 24 hours. Check seals, then store in cool, dark place for up to one year.
Sherri Brooks Vinton wants you to “preserve” local agriculture with your food choices. Her writing, talks and hands-on workshops teach fellow eaters how to find, cook and preserve local, seasonal, farm friendly food. She is currently touring with her latest book, Put ‘em Up! To find out more, visit her: www.sherribrooksvinton.com
Sherri Brooks Vinton is the author of PUT ´EM UP.